Introduction
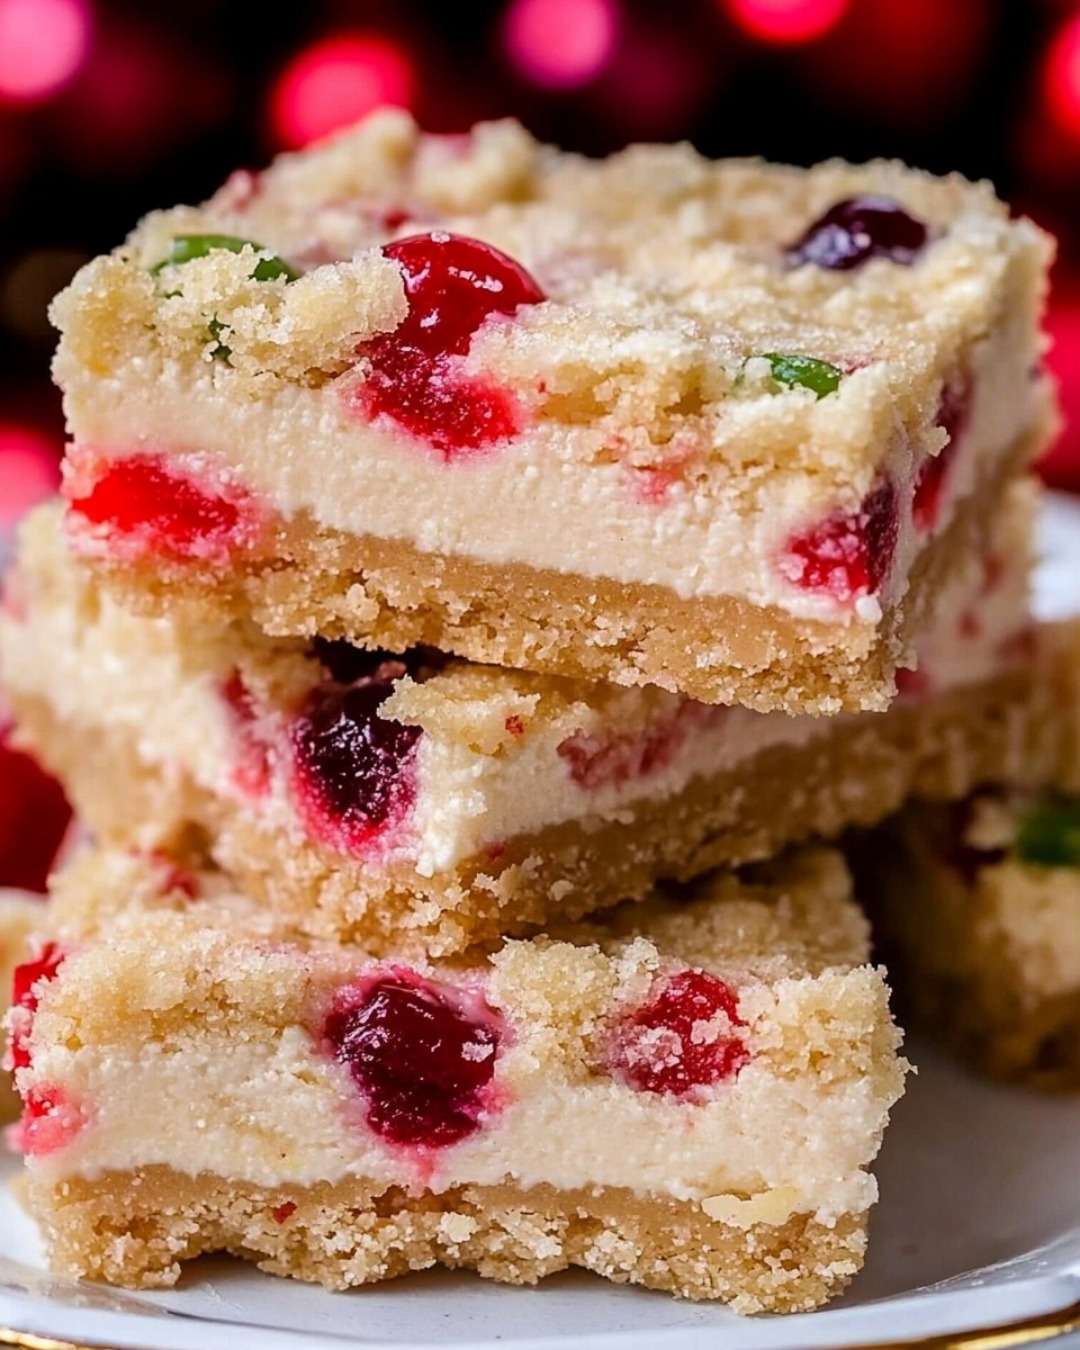
Nothing says Christmas like a dessert that combines festive flavors with stunning presentation! These Merry Cherry Christmas Cheesecake Bars are the ultimate holiday treat, perfect for family gatherings, potlucks, or cozy nights by the fire. Imagine a rich, creamy cheesecake layer infused with hints of vanilla, sitting atop a buttery graham cracker crust, and crowned with a luscious cherry topping. These cheesecake bars are as merry and bright as the holiday season itself, offering a delightful blend of flavors and textures that will leave everyone asking for seconds.
What makes this recipe truly special is how simple it is to make despite looking absolutely spectacular. Whether you’re a seasoned baker or a beginner, these bars come together with minimal effort, yet deliver bakery-level results. Plus, they’re easy to cut and serve, making them ideal for holiday parties or gift-giving.
The vibrant red of the cherry topping, paired with the creamy white cheesecake, captures the colors of Christmas, making this dessert as visually appealing as it is delicious. These bars are also highly versatile—swap out the cherry topping for cranberry sauce or a drizzle of chocolate if you prefer. With just the right balance of sweetness and tang, these cheesecake bars are guaranteed to become a family favorite and a new holiday tradition.
Brief Description of the Recipe
Merry Cherry Christmas Cheesecake Bars are the perfect blend of creamy, crunchy, and fruity flavors, all wrapped up in a festive dessert that’s easy to make and even easier to enjoy. The dessert starts with a simple graham cracker crust that’s buttery and crisp, providing the perfect foundation for the creamy cheesecake layer.
The cheesecake filling is made with cream cheese, sugar, eggs, and vanilla, creating a smooth and luxurious base that melts in your mouth. Once baked to perfection, the cheesecake is topped with a bright and tangy cherry pie filling, adding both flavor and a pop of festive color.
These bars are baked in a rectangular pan, making them easy to slice into squares or rectangles for serving. They’re the ideal size for portion control (or sneaking a second serving!) and can be made ahead of time, saving you from last-minute holiday stress. With their classic flavors and elegant presentation, these cheesecake bars are a crowd-pleasing dessert that’s perfect for celebrating the season.
Why This Recipe is a Winner
This recipe is a winner for so many reasons! First and foremost, it’s incredibly easy to prepare, even if you’ve never baked cheesecake before. The step-by-step instructions ensure you’ll achieve perfect results every time. Plus, these bars are portable and easy to serve, making them ideal for potlucks, holiday parties, or even as edible gifts.
The combination of the buttery crust, creamy cheesecake, and tangy-sweet cherry topping is absolutely irresistible. Unlike store-bought options, these bars are made with fresh, high-quality ingredients, so you can enjoy a dessert that’s free of artificial flavors and preservatives.
What truly makes these cheesecake bars special is their connection to the holiday spirit. Their red and white layers evoke the colors of Christmas, making them a perfect addition to your holiday dessert table. For me, these bars are reminiscent of childhood Christmases, where we’d gather around the table and share desserts while laughing and telling stories. Now, I get to pass down that tradition with this cherished recipe.
Ingredients
The Crust:
- 1 ½ cups graham cracker crumbs
- Purpose: Forms the crunchy base for the cheesecake bars.
- 6 tablespoons unsalted butter, melted
- Purpose: Binds the crust together and adds richness.
- 2 tablespoons granulated sugar
- Purpose: Sweetens the crust slightly.
The Cheesecake Layer:
- 16 ounces (2 blocks) cream cheese, softened
- Purpose: Creates the creamy and rich filling.
- ½ cup granulated sugar
- Purpose: Sweetens the cheesecake.
- 2 large eggs
- Purpose: Adds structure and binds the filling.
- 1 teaspoon pure vanilla extract
- Purpose: Enhances the flavor of the cheesecake.
The Topping:
- 1 can (21 ounces) cherry pie filling
- Purpose: Adds a tangy-sweet topping and festive color.
Preparation Tips
Prepare the Crust
- Preheat your oven to 350°F (175°C) and line a 9×13-inch baking dish with parchment paper, leaving an overhang for easy removal.
- In a medium bowl, combine the graham cracker crumbs, melted butter, and sugar. Mix until the crumbs are evenly coated and the mixture resembles wet sand.
- Press the crust mixture firmly and evenly into the bottom of the prepared baking dish. Use the back of a spoon or the bottom of a measuring cup to smooth it out.
- Bake the crust for 8-10 minutes, then set aside to cool slightly while you prepare the filling.
Make the Cheesecake Filling
- In a large mixing bowl, beat the softened cream cheese and sugar with a hand or stand mixer until smooth and creamy, about 2-3 minutes.
- Add the eggs, one at a time, mixing well after each addition.
- Mix in the vanilla extract until fully incorporated. Be careful not to overmix, as this can introduce too much air into the batter.
Assemble and Bake
- Pour the cheesecake filling over the pre-baked crust, spreading it out evenly with a spatula.
- Bake for 25-30 minutes, or until the center is set and no longer jiggles when the pan is gently shaken.
- Remove from the oven and let cool to room temperature, then refrigerate for at least 3 hours (or overnight) to allow the cheesecake to fully set.
Add the Cherry Topping
- Once the cheesecake is chilled, evenly spread the cherry pie filling over the top. Use the back of a spoon to smooth it out.
- For a festive touch, garnish with fresh mint leaves or a dusting of powdered sugar before serving.
Serving Suggestions
- Cut the bars into squares or rectangles for a clean and professional presentation.
- Serve chilled for the best flavor and texture.
- Pair with a cup of hot cocoa, spiced tea, or coffee for the perfect holiday treat.
- Add a dollop of whipped cream on top for an extra touch of decadence.
Helpful Tips To Make Christmas Cheesecake bars
- Room Temperature Ingredients: Ensure the cream cheese and eggs are at room temperature before mixing to avoid lumps in the batter.
- Prevent Cracking: Avoid overbaking the cheesecake layer, as this can cause cracks.
- Chill Time: Don’t skip the chilling step—this is crucial for achieving the perfect texture.
- Use a Sharp Knife: To get clean slices, wipe your knife with a damp cloth between cuts.
Substitutions and Variations
- Crust Options: Substitute the graham cracker crumbs with crushed gingersnaps or chocolate wafer cookies for a different flavor.
- Topping Alternatives: Use blueberry, raspberry, or cranberry pie filling instead of cherry.
- Gluten-Free Option: Use gluten-free graham crackers for the crust.
- Lighter Version: Use reduced-fat cream cheese and swap half of the butter for applesauce in the crust.
Frequently Asked Questions
- Can I make this recipe ahead of time?
Yes! These bars can be made 1-2 days in advance and stored in the refrigerator. - Can I freeze cheesecake bars?
Yes, freeze them without the topping for up to 2 months. Add the cherry topping after thawing. - Can I use homemade cherry topping?
Absolutely! Use fresh or frozen cherries to make your own topping. - How do I prevent the crust from crumbling?
Pack the crust tightly using the back of a spoon or a measuring cup. - What if my cheesecake cracks?
Don’t worry—the cherry topping will cover any imperfections! - Can I use a smaller pan?
You can, but the bars will be thicker, and baking time may need to be adjusted. - What if I don’t have parchment paper?
Grease the pan well to prevent sticking. - How long do these bars last?
Store in the refrigerator for up to 5 days. - Can I double the recipe?
Yes, but bake in two pans for even cooking. - Do I have to use a hand mixer?
No, but a hand or stand mixer will give the smoothest results.
Ideas for Repurposing Leftovers
- Cheesecake Parfaits: Layer leftover bars in a glass with whipped cream and extra cherries for a new dessert.
- Cheesecake Milkshake: Blend leftover bars with milk and ice cream for a decadent milkshake.
- Cheesecake Ice Cream Topping: Crumble leftover bars over vanilla ice cream for an indulgent treat.
Related Recipes
Print
Merry Cherry Christmas Cheesecake Bars Recipe
Description
This recipe is a winner for so many reasons! First and foremost, it’s incredibly easy to prepare, even if you’ve never baked cheesecake before. The step-by-step instructions ensure you’ll achieve perfect results every time. Plus, these bars are portable and easy to serve, making them ideal for potlucks, holiday parties, or even as edible gifts.
Ingredients
For the Crust:
- 1 ½ cups graham cracker crumbs
- Purpose: Forms the crunchy base for the cheesecake bars.
- 6 tablespoons unsalted butter, melted
- Purpose: Binds the crust together and adds richness.
- 2 tablespoons granulated sugar
- Purpose: Sweetens the crust slightly.
For the Cheesecake Layer:
- 16 ounces (2 blocks) cream cheese, softened
- Purpose: Creates the creamy and rich filling.
- ½ cup granulated sugar
- Purpose: Sweetens the cheesecake.
- 2 large eggs
- Purpose: Adds structure and binds the filling.
- 1 teaspoon pure vanilla extract
- Purpose: Enhances the flavor of the cheesecake.
For the Topping:
- 1 can (21 ounces) cherry pie filling
- Purpose: Adds a tangy-sweet topping and festive color.
Instructions
Step 1: Prepare the Crust
- Preheat your oven to 350°F (175°C) and line a 9×13-inch baking dish with parchment paper, leaving an overhang for easy removal.
- In a medium bowl, combine the graham cracker crumbs, melted butter, and sugar. Mix until the crumbs are evenly coated and the mixture resembles wet sand.
- Press the crust mixture firmly and evenly into the bottom of the prepared baking dish. Use the back of a spoon or the bottom of a measuring cup to smooth it out.
- Bake the crust for 8-10 minutes, then set aside to cool slightly while you prepare the filling.
Step 2: Make the Cheesecake Filling
- In a large mixing bowl, beat the softened cream cheese and sugar with a hand or stand mixer until smooth and creamy, about 2-3 minutes.
- Add the eggs, one at a time, mixing well after each addition.
- Mix in the vanilla extract until fully incorporated. Be careful not to overmix, as this can introduce too much air into the batter.
Step 3: Assemble and Bake
- Pour the cheesecake filling over the pre-baked crust, spreading it out evenly with a spatula.
- Bake for 25-30 minutes, or until the center is set and no longer jiggles when the pan is gently shaken.
- Remove from the oven and let cool to room temperature, then refrigerate for at least 3 hours (or overnight) to allow the cheesecake to fully set.
Step 4: Add the Cherry Topping
- Once the cheesecake is chilled, evenly spread the cherry pie filling over the top. Use the back of a spoon to smooth it out.
- For a festive touch, garnish with fresh mint leaves or a dusting of powdered sugar before serving.
Notes
- Prep Time: 20 minutes
- Cook Time: 35 minutes
- Chill Time: 3 hours
- Total Time: 4 hours
- Yield: 16 bars
- Category: Dessert
- Method: Baking
- Cuisine: American
- Diet: Vegetarian
- Keywords: Christmas cheesecake bars, cherry cheesecake dessert, holiday cheesecake
Equipment:
- 9×13-inch baking dish
- Hand or stand mixer
- Mixing bowls
- Parchment paper
Nutrition (Per Serving):
- Calories: 220
- Sugar: 17g
- Sodium: 150mg
- Fat: 12g
- Saturated Fat: 7g
- Unsaturated Fat: 5g
- Trans Fat: 0g
- Carbohydrates: 24g
- Fiber: 0g
- Protein: 3g
- Cholesterol: 50mg